A practical guide comparing cloud-managed security cameras to traditional NVR/DVR systems. Learn why businesses are migrating to cloud and when on-premise still makes sense.

Bullet cameras are a practical choice when you need visible, directional coverage across entrances, driveways, parking areas, and property lines. The right system depends as much on placement, lighting, networking, and maintenance as on resolution.
Bullet cameras are elongated, directional security cameras commonly used for outdoor and perimeter monitoring. Their visible housing can make them a useful deterrent, while the forward-facing lens supports focused views across a driveway, doorway, or fence line. A thoughtful design starts with the scene rather than the camera model: determine what must be seen, from how far away, and under which lighting conditions.
A bullet camera typically has a cylindrical or rectangular body mounted on an adjustable bracket. The shape points naturally toward a specific area, making the camera straightforward to aim and easy to identify during a site walk. This form factor can suit both small business entrances and larger exterior areas where a defined viewing direction matters.
The visible orientation is not a substitute for good planning. A camera aimed too high may miss faces, while one aimed too low can expose the lens to tampering or capture too much nearby ground. Mounting hardware should allow small angle changes after installation.
The main components include the image sensor, lens, infrared or low-light system, housing, network or video connection, and mounting bracket. Resolution affects how much detail the camera records, but it does not determine usable identification on its own. Lens selection, lighting, compression, distance, and the size of the subject in the frame all matter.
Infrared illumination can support nighttime viewing, although reflective surfaces, rain, dust, and uneven lighting may still reduce clarity. A camera should be evaluated in the conditions it will actually face, not only in a bright showroom or daytime sample clip. For a plain-language overview of the form factor, this bullet camera design guide can provide useful background.
Bullet cameras are usually easier to aim at a particular direction, and their shape makes the intended coverage apparent. Dome cameras have a less directional appearance and can be useful where a discreet profile or a broad ceiling-mounted view is preferred. Neither design is automatically better; the decision depends on the mounting surface, risk of tampering, desired coverage, and maintenance access.
A bullet camera may be a natural fit along a wall facing a gate, while a dome may suit an interior lobby with several approaches. In either case, the lens should be selected for the scene instead of choosing a camera based only on its housing.
Bullet cameras are often installed at building entrances, loading areas, driveways, parking lots, side yards, and perimeter lines. Indoors, they can help monitor corridors, stock areas, or large rooms when a directional view is useful. Commercial sites may combine several camera styles to address different sightlines.
The practical question is whether the camera can produce useful evidence at the relevant distance and time of day. That means checking faces, vehicle movement, door activity, and other details during both normal and low-light conditions.
Buying bullet cameras involves more than comparing megapixels or advertised range. A suitable system balances image detail, environmental protection, coverage, alerts, connectivity, storage, and the cost of installation. Organizations should also consider who will monitor events, who will administer the system, and how the design will be supported across one or many locations.
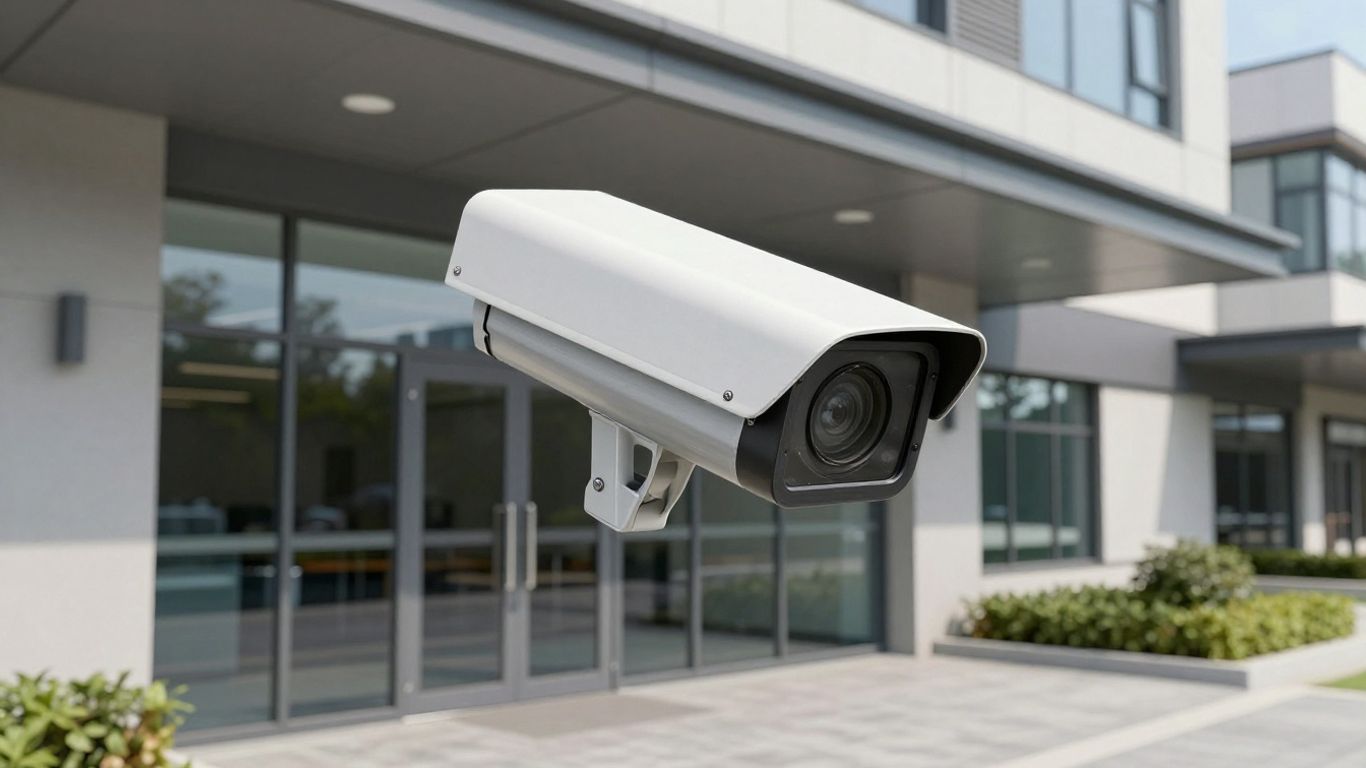
Resolution describes the amount of image detail, but the usable result depends on the lens and the distance between the camera and the subject. A wider view may cover more ground while showing less detail per person; a narrower view may support identification farther away but leave more blind areas. Test representative scenes before committing to a standard.
Night vision should be judged by the scene, including ambient light, reflective walls, headlights, and changing weather. Usable nighttime detail is usually more valuable than a high specification that performs poorly at the property’s actual distances.
Outdoor cameras need protection from rain, dust, temperature changes, and sunlight. Look for a housing rating suited to the installation environment and inspect how cables and connectors will be protected. The bracket and fasteners matter too, especially on exposed walls or reachable mounting points.
Vandal resistance is a combination of physical placement, housing strength, tamper-resistant hardware, and a view that does not depend on a camera being easy to reach. A protected cable path can prevent a simple disconnection from taking the camera offline.
Field of view determines how much of a scene appears in the frame. Wide lenses can reduce the number of cameras needed in some areas, while narrower lenses may be better for gates, distant doors, or vehicle approaches. Optical zoom can help when the camera must alternate between a broad scene and a specific distant area, but it does not replace careful positioning.
Sketch the property and mark the required coverage before selecting a lens. Include the height of likely subjects, the direction of travel, and the points where an incident would need to be reviewed.
Motion detection can reduce the time spent reviewing continuous footage, but poorly tuned alerts may create noise from trees, headlights, shadows, or passing traffic. Configure detection zones around the areas that matter and exclude irrelevant movement where possible. Alerts should support a defined response process rather than simply generate more notifications.
Consider how alerts will be acknowledged, escalated, and retained for review. For multi-site organizations, consistent naming and settings can make operations easier to manage, while local conditions may still require site-specific tuning.
Wired connections generally provide a predictable path for video and power, while wireless installation can be useful where cabling is difficult. Wireless designs still need dependable power, signal coverage, encryption, and a plan for outages. Power over Ethernet can simplify some installations by carrying power and data over one network cable, provided the network and power budget support it.
Before choosing a connection method, review the building structure, cable routes, switch capacity, recorder location, and service access. A short installation decision can affect years of reliability.
The best camera design changes with the property and the risk. A home entrance may need a modest field of view and simple alerts, while a warehouse perimeter may require longer-range detail, protected cabling, and a larger storage plan. Start with the event the camera must help explain, then work backward to the view, lighting, retention, and response process.
For a home or small site, prioritize the areas where people approach, packages arrive, vehicles enter, or sightlines disappear behind structures. A camera should show the approach and the immediate activity without pointing unnecessarily into neighboring private areas. Local storage, cloud storage, or a recorder each bring different access and retention considerations.
A homeowner may value simple notifications, while a small business may need shared access and a documented response process. Keep the system understandable enough that the people responsible for it can actually use it.
Commercial properties often need coverage at employee entrances, visitor doors, loading zones, and parking routes. The camera plan should account for changing light, vehicle headlights, tall vehicles, and the distance from a parking space to the lens. A site assessment can reveal whether one wide view or several focused views will produce better evidence.
For a quick comparison, this table connects common locations with the design priorities that usually matter most:
| Location | Primary priority | Common planning concern |
|---|---|---|
| Main entrance | Face-level detail | Backlighting and queuing |
| Parking area | Vehicle and pedestrian coverage | Headlights and long distances |
| Loading dock | Activity and delivery visibility | Obstructions from trucks |
| Side or rear perimeter | Directional detection | Limited lighting and access |
These priorities are starting points, not a substitute for testing. A professional assessment can confirm whether the proposed height, lens, and nighttime performance fit the site.
Retail and industrial environments may combine customer areas, restricted zones, inventory, vehicles, and equipment. Cameras should support the operating workflow without creating excessive monitoring or alert volume. In a warehouse, elevation and obstructions can be decisive; in a store, entrances, checkout approaches, and stock access may need different views.
The system should also fit the organization’s network and access model. If facilities, IT, and security teams share responsibility, define ownership for user accounts, footage requests, maintenance, and incident escalation before installation.
Long-range views require careful attention to lens choice, scene lighting, atmospheric conditions, and the size of the subject in the image. A camera may show movement at a distance without providing enough detail to identify a person or vehicle. Perimeter designs often work best as a sequence of overlapping views rather than one camera asked to cover everything.
Thermal or specialized imaging may be appropriate for some difficult environments, but the choice should follow a documented detection and response requirement. The goal is useful, reviewable information, not simply the longest advertised range.
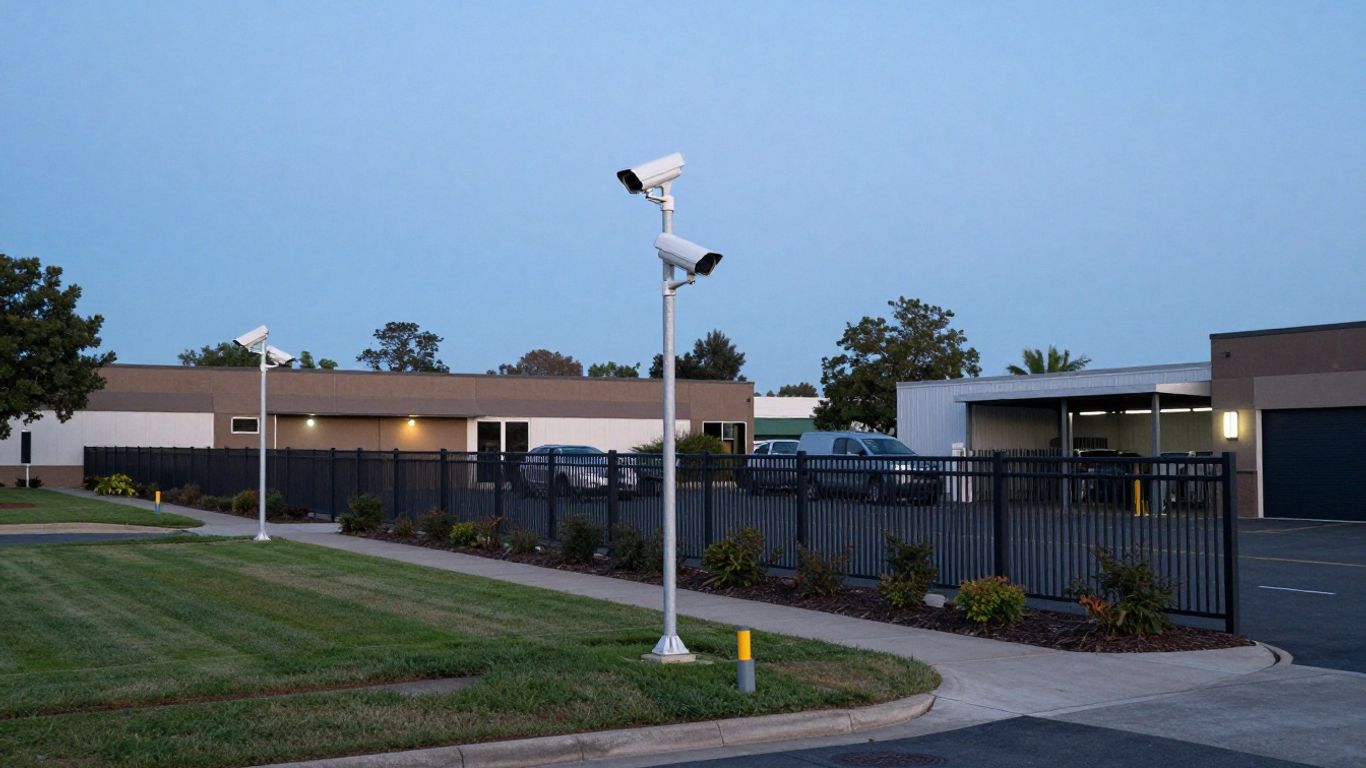
Placement determines whether a technically capable camera produces useful footage. Before drilling, walk the property at different times of day and note entrances, shadows, reflective surfaces, landscaping, rooflines, and likely approach paths. A well-planned camera can reduce blind spots without multiplying equipment unnecessarily.
Mount cameras high enough to limit casual tampering, but not so high that faces become indistinct. The angle should show the approach and the area where an event is likely to occur, with enough vertical framing to preserve useful detail. Wall surfaces, soffits, poles, and corners each affect vibration, cable routing, and service access.
Avoid aiming directly into a bright sky or low afternoon sun when another angle can provide the same coverage. Leave room to adjust the bracket during commissioning and seasonal checks.
Entrances often need a view that captures a person approaching before they reach the door, plus enough detail at the threshold. Property lines and side paths may need overlapping coverage because fences, trees, and outbuildings can create narrow gaps. Review the planned image from the subject’s perspective rather than relying only on a floor plan.
For larger sites, number cameras consistently and document the covered zone. That makes future troubleshooting and incident review less ambiguous, especially when several locations use similar layouts.
Light changes throughout the day. Test scenes with headlights, glass doors, pale walls, direct sun, and nearby lamps before finalizing the view. Infrared reflections from close surfaces can wash out a nighttime image, while a distant unlit area may need supplemental lighting or a different camera position.
A short nighttime walk-through is often more revealing than another daytime adjustment. Review recorded footage, not only the live view, because compression and exposure changes may affect the final evidence.
Cameras should be limited to legitimate security purposes and aimed to avoid unnecessary views into private spaces. Consider employees, visitors, neighbors, public areas, and any workplace notice or retention requirements that apply to the organization. Access permissions should match job responsibilities, and footage should not be retained indefinitely without a reason.
Privacy review belongs in the design stage, not after installation. Document the purpose and viewing boundary for each camera so changes can be evaluated consistently.
Installation is where the design becomes an operating system. Confirm the mounting surface, cable route, power budget, network path, recorder capacity, and administrative ownership before equipment is fixed in place. For organizations with multiple sites, a repeatable installation standard can simplify support without forcing every location into an identical layout.
Use suitable fasteners for the wall or pole, protect exterior cable runs, and leave enough service loop for future adjustments. Mark the intended view before drilling, then verify that the surface can support the camera and bracket in wind or vibration. Weatherproof glands and sealed connections are particularly important at outdoor transitions.
Label both ends of each cable and record the camera location. Clear labeling saves time when a camera needs to be replaced, moved, or tested months later.
Connect the camera according to the selected architecture, whether that means a network video recorder, a managed network, local storage, or another approved arrangement. Change default credentials, restrict administrative access, and confirm that firmware and network settings align with the organization’s standards. Separate camera traffic or use appropriate network controls when the environment calls for it.
The network path should be tested under realistic load. A camera that works during a quiet installation may behave differently when several streams, remote users, and backups operate at once.
Configure zones around doors, paths, gates, and other meaningful activity areas. Exclude roads, trees, moving shadows, or neighboring spaces when they create irrelevant events. Set alert schedules around operating hours and define who receives each alert.
Alerts should be measured after deployment. If people begin ignoring them, reduce unnecessary triggers before adding more notifications or cameras.
Test live and recorded footage from several distances and angles. Walk through the scene, drive the expected route, open doors, and repeat the test at night if the camera will operate after dark. Confirm timestamps, stream stability, image focus, and the ability to retrieve footage.
Make adjustments while the installer and site owner can compare the image with the physical scene. Small changes to height or angle often matter more than a larger specification on a product sheet.
Secure accessible hardware, protect exposed cable, and check that the bracket cannot be easily redirected. Outdoor equipment should be installed with the housing and connections suited to the environment. Document who can access the camera, recorder, and network equipment.
A complete handoff should include camera locations, credentials held in an approved system, warranty details, diagrams, and a basic recovery procedure. Harris Technology Services can help organizations coordinate physical security, network infrastructure, and ongoing technology management around that handoff.
Security footage is only useful when cameras remain clean, connected, correctly aimed, and accessible to authorized users. Maintenance should be scheduled rather than left to the moment a critical recording is needed. A consistent process also helps organizations compare performance across sites and plan upgrades based on evidence.
Dust, pollen, insects, water spots, and fingerprints can reduce image quality surprisingly quickly. Clean the lens with appropriate materials, inspect the housing for cracks, and check seals and cable entries after severe weather or construction. Confirm that the camera has not shifted because of vibration, impact, or a loose bracket.
Review a sample of daytime and nighttime footage after cleaning. The goal is to confirm that the recorded image, not just the glass, is clear.
Maintain a record of camera models, firmware versions, credentials, and responsible administrators. Apply updates through the organization’s approved process, test changes where possible, and remove unused accounts. Use unique passwords and appropriate multifactor authentication when supported by the surrounding system.
Harris Technology Services approaches this kind of work as part of managed technology operations, where physical security and IT responsibilities can be coordinated instead of treated as separate tasks.
When video fails, begin with the basics: power, link lights, cable condition, network reachability, recorder status, and storage capacity. If the image is present but poor, inspect focus, lens cleanliness, exposure, infrared reflections, and camera position. Compare the problem with another camera on the same network to narrow the cause.
Keep a short incident log. Dates, symptoms, weather, recent changes, and corrective actions can reveal recurring cable, power, or environmental problems.
Additional cameras increase network traffic, power demand, recording capacity, administrative work, and privacy obligations. Review the recorder or storage platform before ordering equipment, and confirm that switches and uplinks can support the added streams. Establish retention requirements based on operational needs rather than storing everything indefinitely.
Expansion is easier when the original design includes spare capacity and consistent naming. It is also a useful time to review whether existing cameras still cover the highest-priority areas.
Replacement may be justified when a camera repeatedly loses connection, no longer produces adequate detail, has damaged weather protection, or cannot receive necessary security updates. An upgrade may also make sense when the property changes, lighting conditions worsen, or the organization needs broader access and reporting.
Do not replace equipment solely because a newer resolution exists. Compare the current failure points with the desired outcome, then assess the lens, mounting, network, storage, and management requirements together. Harris Technology Services can support that broader assessment for organizations managing a single site or a distributed environment.
Bullet cameras can provide focused, practical coverage when their imaging, mounting, networking, and maintenance requirements are considered together. Start with the scenes and risks, test the design in real lighting, and build a system that the responsible people can manage consistently as the organization grows.
They are commonly used for directional views of entrances, driveways, parking areas, loading zones, and property perimeters. Their visible housing and adjustable aim can suit both deterrence and focused monitoring.
Yes. They can work indoors where a directional view is useful, such as corridors, stockrooms, warehouses, and large rooms. The housing and mounting method should match the indoor environment.
Many models include infrared or low-light capabilities, but performance varies with distance, lighting, reflective surfaces, weather, and lens selection. Test nighttime footage in the actual scene before relying on it.
Mounting height should balance tamper resistance with useful face and activity detail. The correct height depends on the site, camera angle, lens, and the type of evidence required.
Neither is universally better. Wired systems often provide a predictable connection, while wireless systems can simplify locations where cabling is difficult. Power, signal reliability, security, and outage planning matter in both designs.
Inspect them on a schedule appropriate to the environment, and check them after severe weather, construction, or an impact. Cleaning, firmware review, account checks, cable inspection, and footage testing should all be part of maintenance.
Usually not. Coverage depends on the property’s size, structures, lighting, lens choices, and required detail. Multiple overlapping views are often more effective than asking one camera to cover every direction and distance.
Connect with us to explore our scalable solutions tailored to your unique needs and receive a personalized free quote.